Piriapolis - Deep Locker Seals 2
01/11/11 00:40
As forecast, strongish (F5) NE winds continued today with the water level dropping slowly throughout the day.
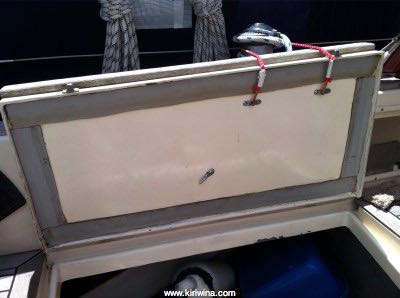
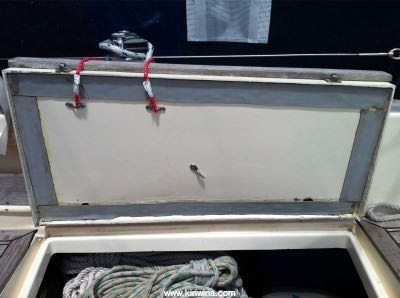
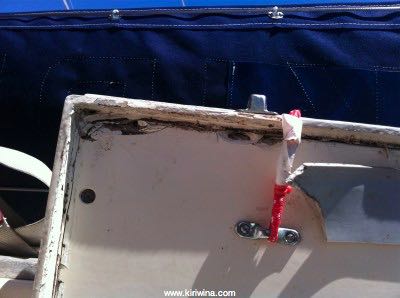
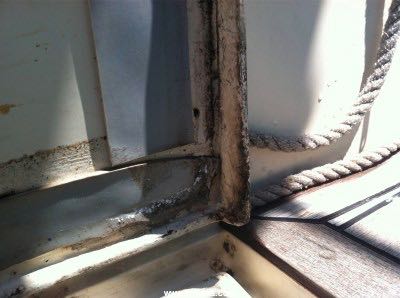
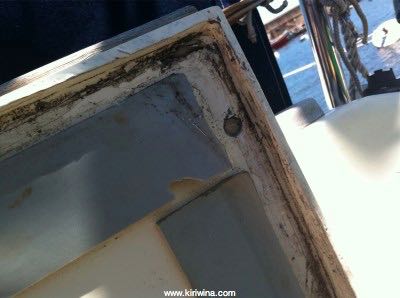
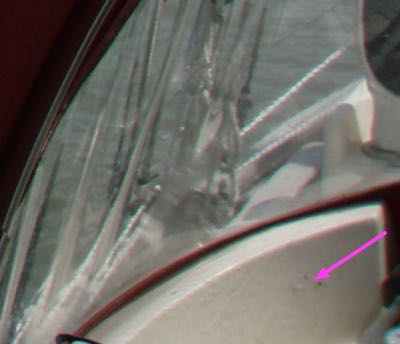
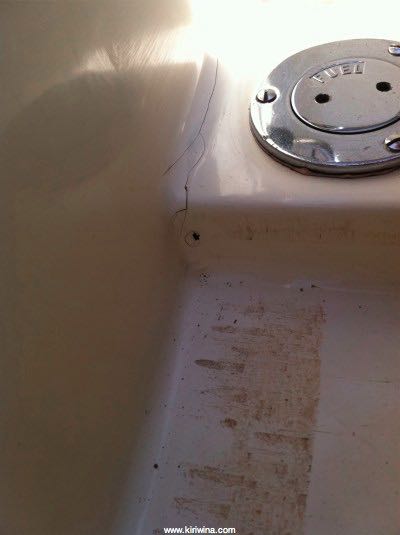
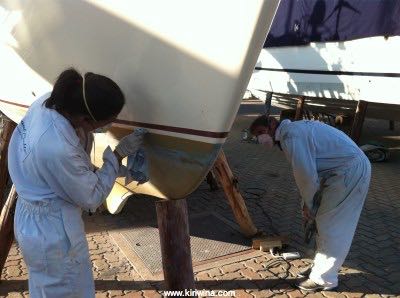
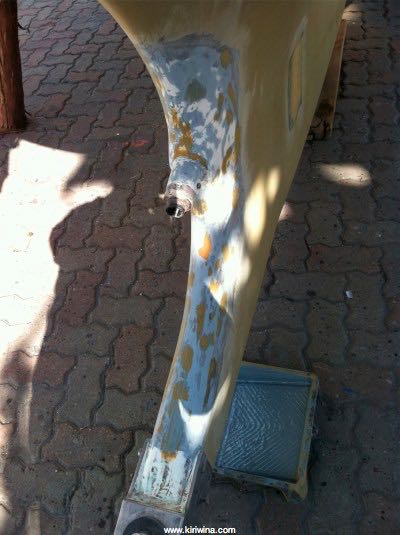
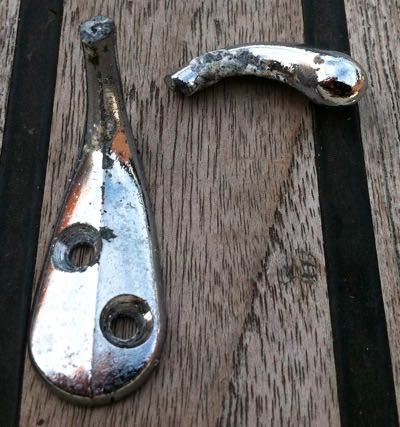
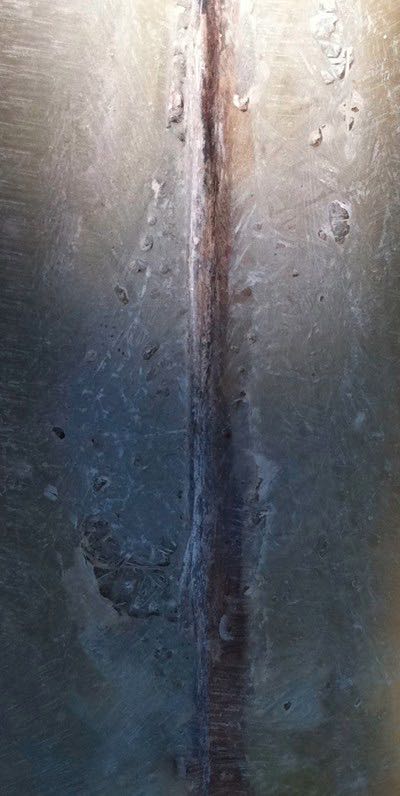
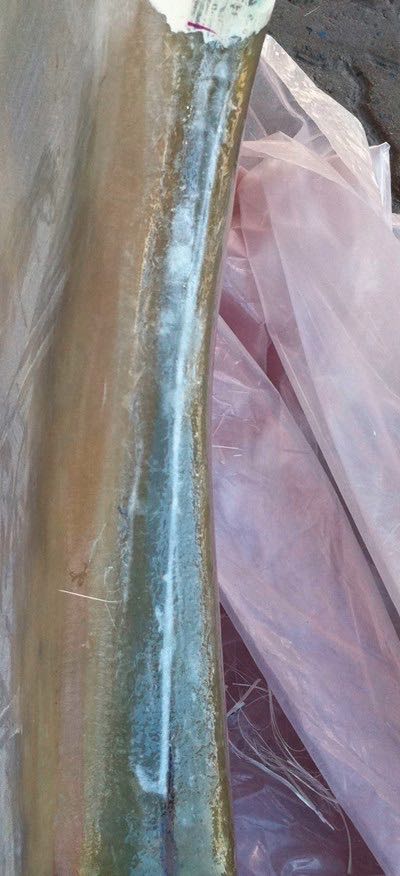
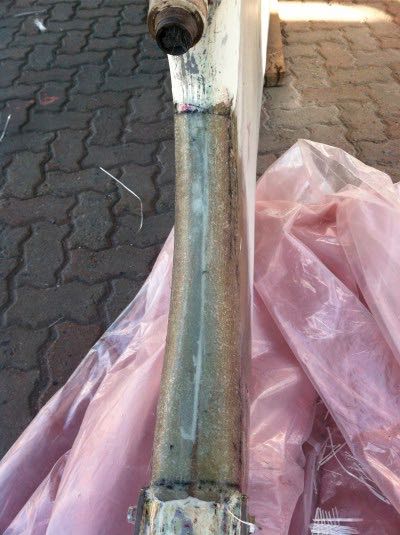
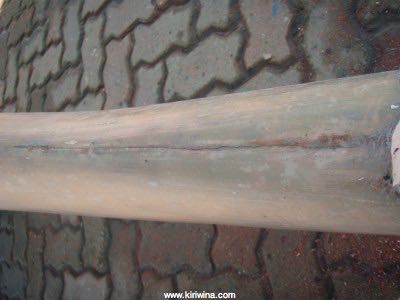
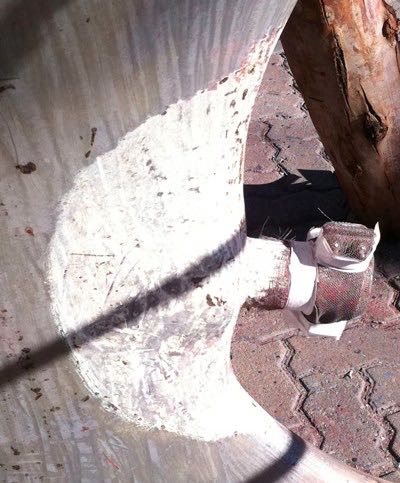
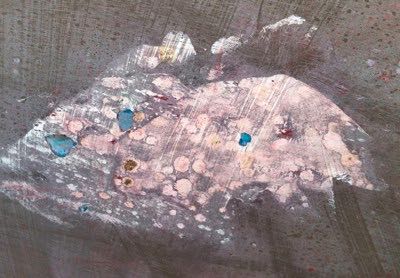
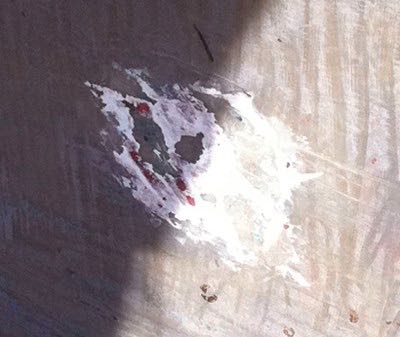
With stronger thinners to dissolve residual glue I continued refurbishing both deep locker seals. Very fiddly and time consuming work but finally completed.
Port
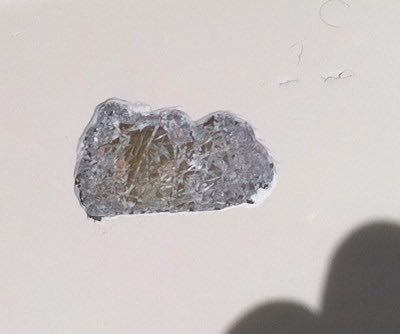
Starboard
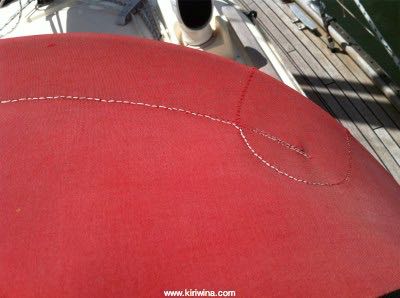
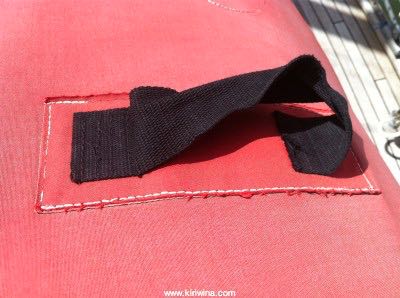
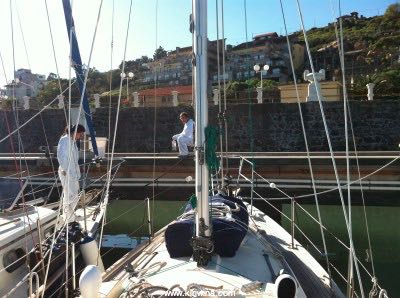
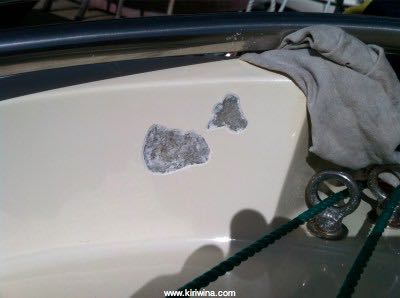
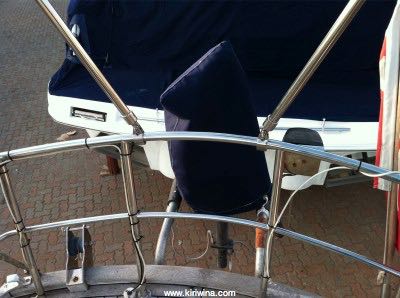
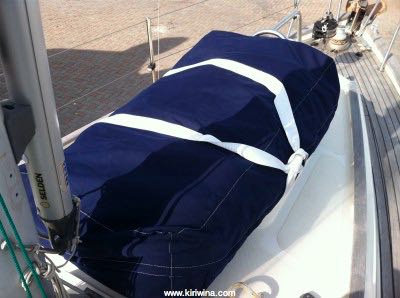
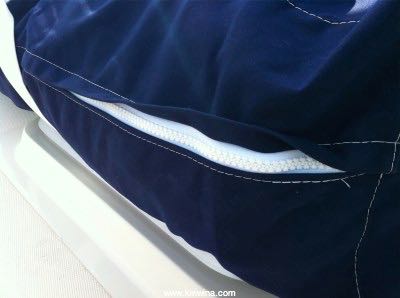
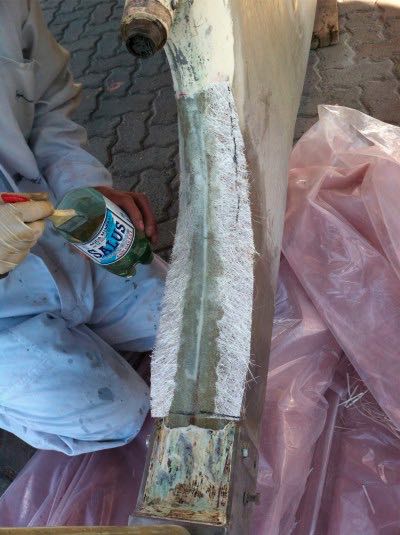
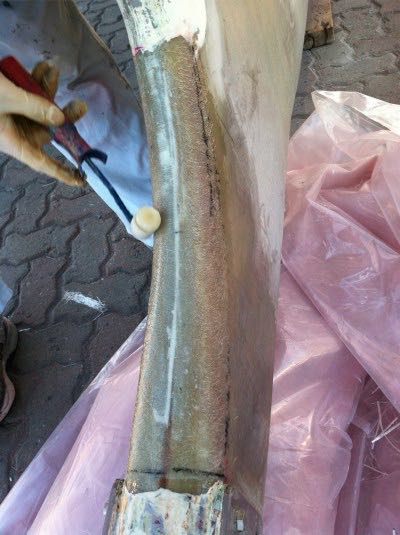
Also did some sewing repairs on the sprayhood. Should be good for another year.
Main seam.
Grab handle.
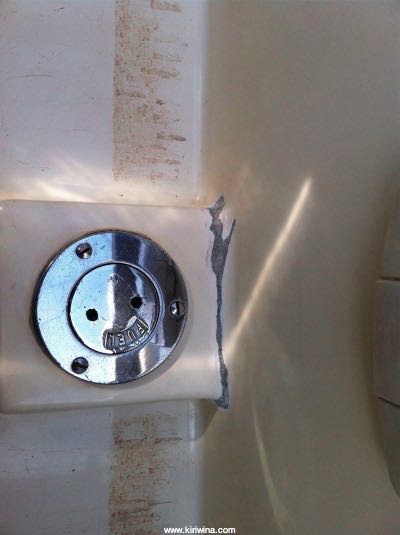
With stronger thinners to dissolve residual glue I continued refurbishing both deep locker seals. Very fiddly and time consuming work but finally completed.
Port
Starboard
Also did some sewing repairs on the sprayhood. Should be good for another year.
Main seam.
Grab handle.
Piriapolis - Deep Locker Seals
31/10/11 00:47
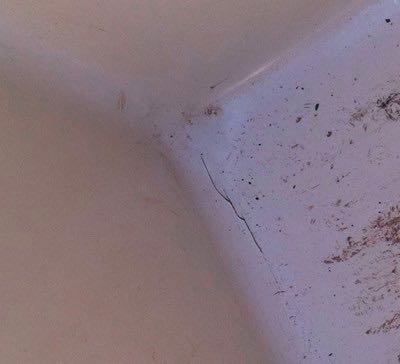
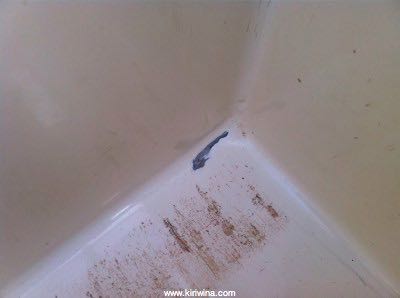
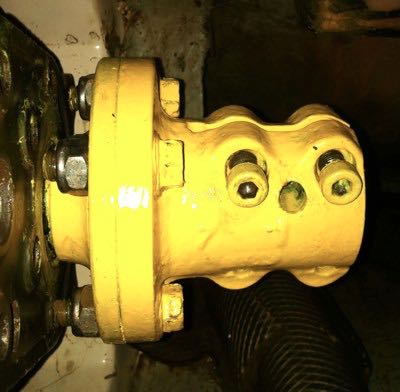
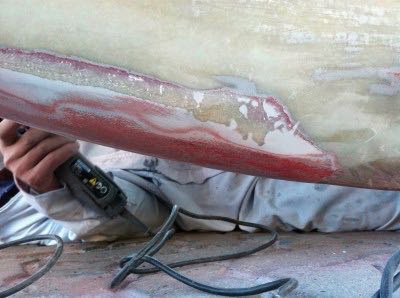
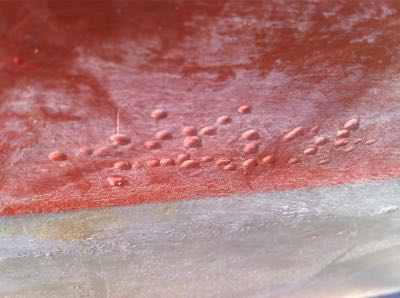
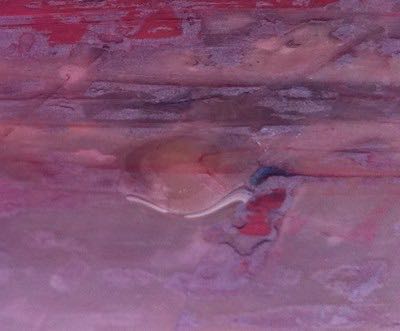
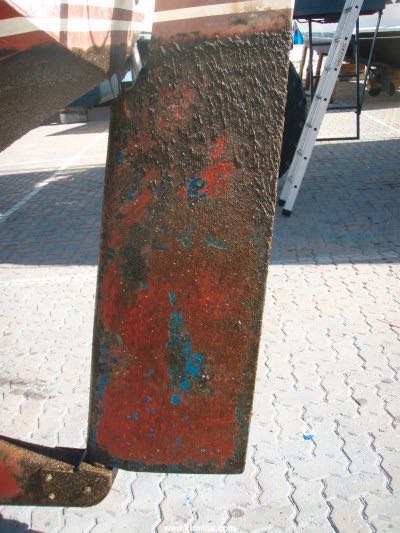
For some time now I have been wanting to tackle the deep locker lid seals. The lids themselves comprise a GRP frame with an inner top screwed in place. This inner top has been roughly sealed with gelcoat. The end result is a poorly finished agricultural bodge.
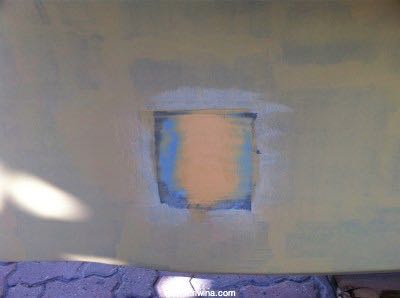
Poorly applied gelcoat breaking up in places. This needs to be made good with epoxy filler.
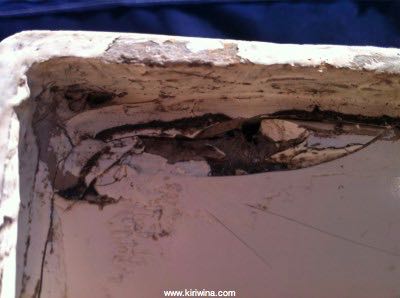
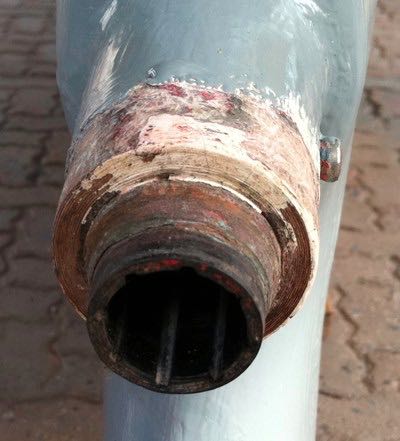
Neoprene seals are in pretty good knick but the the original glue and touchup glue has suffered not coped well with heat over the years.
Poor quality glue has allowed the seals to move and scrunch up in places.
To seal properly the neoprene needs to be hard against the lid edges.
The job entails removing all seals, cleaning them up, removing all residual glue from the lid and re-gluing the seals in place. A very slow and fiddly process slowed further by my lack of good thinners to remove the glue.
Poorly applied gelcoat breaking up in places. This needs to be made good with epoxy filler.
Neoprene seals are in pretty good knick but the the original glue and touchup glue has suffered not coped well with heat over the years.
Poor quality glue has allowed the seals to move and scrunch up in places.
To seal properly the neoprene needs to be hard against the lid edges.
The job entails removing all seals, cleaning them up, removing all residual glue from the lid and re-gluing the seals in place. A very slow and fiddly process slowed further by my lack of good thinners to remove the glue.
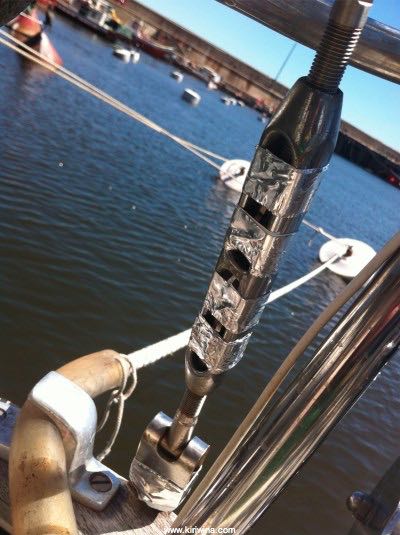
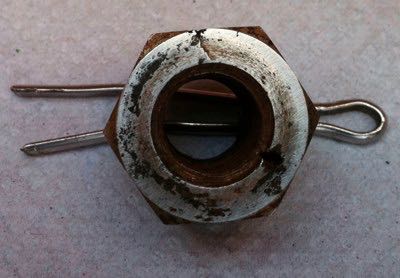
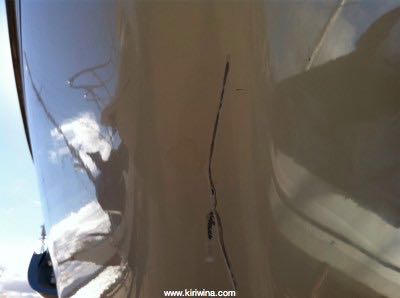
Split Pin Taping.
30/10/11 01:10
Spent an hour hosing off all the salt accumulated during recent strong S-SE winds.
The standard method of taping split pins is to use electrical tape. Sadly, this tape does not do well in a hot climate. It starts to come off pretty quickly. Three years ago in Bahia I tried duct tape. This was more durable but when removed here, in Piriapolis, for a rigging check much of the outer layer had worn away leaving the membrane and hardened glue.
My latest idea is to apply electrical tape in the usual way but then add an outer layer of reflective silver tape. This silver tape is sold in Argentina and used to protect exterior insulation on domestic air conditioner piping. We shall see.
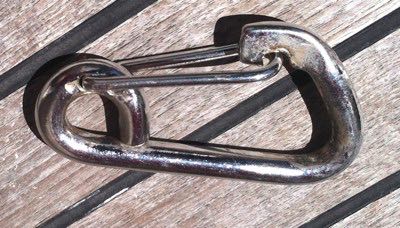
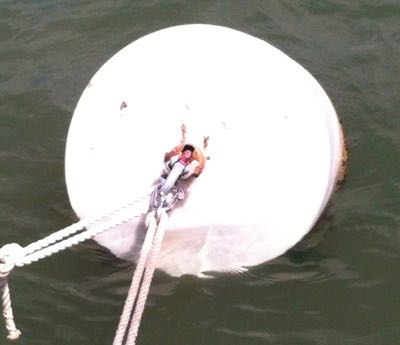
In most Hidrografia ports n Uruguay the standard mooring arrangement is two lines astern to a buoy/s and two bow lines to the dock. After some experimentation I use this type of hook with a stainless steel shackle. The mooring line is attached using a long lead bowline with a round turn on the shackle. For longer periods it would be better to splice a stainless steel thimble to the line.
I noticed that my hook did not seem to be hanging correctly. Pulling the boat back to the buoy I discovered that the Hidrografia had added a new larger shackle to the buoy.
They did so without removing my hook from the existing shackle first. End result, a dogs breakfast whereby my hook was jammed in place by the new shackle.
I had to get the adjacent boat to slack his line and then put a line round the bottom of the buoy to winch it up so I could ease the load and free my hook. A process which took 45 minutes in calm conditions. Tango India Uniform.
After tidying.
The standard method of taping split pins is to use electrical tape. Sadly, this tape does not do well in a hot climate. It starts to come off pretty quickly. Three years ago in Bahia I tried duct tape. This was more durable but when removed here, in Piriapolis, for a rigging check much of the outer layer had worn away leaving the membrane and hardened glue.
My latest idea is to apply electrical tape in the usual way but then add an outer layer of reflective silver tape. This silver tape is sold in Argentina and used to protect exterior insulation on domestic air conditioner piping. We shall see.
In most Hidrografia ports n Uruguay the standard mooring arrangement is two lines astern to a buoy/s and two bow lines to the dock. After some experimentation I use this type of hook with a stainless steel shackle. The mooring line is attached using a long lead bowline with a round turn on the shackle. For longer periods it would be better to splice a stainless steel thimble to the line.
I noticed that my hook did not seem to be hanging correctly. Pulling the boat back to the buoy I discovered that the Hidrografia had added a new larger shackle to the buoy.
They did so without removing my hook from the existing shackle first. End result, a dogs breakfast whereby my hook was jammed in place by the new shackle.
I had to get the adjacent boat to slack his line and then put a line round the bottom of the buoy to winch it up so I could ease the load and free my hook. A process which took 45 minutes in calm conditions. Tango India Uniform.
After tidying.
Liferaft Collection
28/10/11 23:51
Took the 08:50 coach into Montevideo and then a collectivo down to Ciudad Vieja.
First stop was a chart agency in Ciudad Vieja. I wanted to buy Uruguayan chart #50 (Montevideo to Colonia) and Brazilian charts for Florianapolis and approaches. It seems most Uruguayan charts are out of stock (as they were in BsAs as well) but a did get one of Montevideo and approaches. Cost US$31.50. They didn't stock Brazilian charts.
Then on to LCL Shipchandlers to pick up my liferaft. Final cost US$310. The original quote was US$400 but I chose not to replace a bottle of seasick pills at US$45 and reduced the flare count by one saving a further US$45. Unlike 2007 in Tenerife they gave me a certificate for three years.
Met Günter from "Cora Mae" for another fine lunch in Estancia del Puerto in the old market before returning to piriapolis.
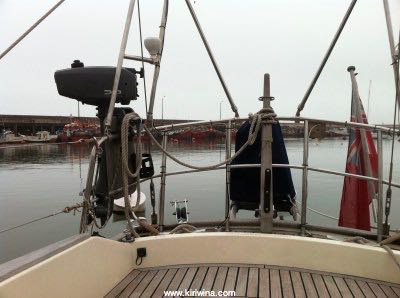
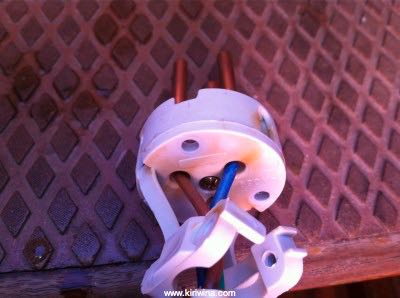
Tiller Pilot Wiring Check
27/10/11 22:45
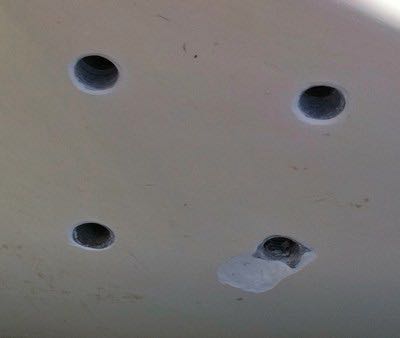
Deckhead Holes
26/10/11 23:44
Liferaft Service
25/10/11 22:45
Cerro de Torro
24/10/11 22:48
Fog
23/10/11 22:53
Pampero
22/10/11 22:52
Seals
21/10/11 22:51
Maintenance
20/10/11 22:50
Tigre to Piriapolis
19/10/11 22:49
New Dodgers - Piriapolis
09/10/11 21:21
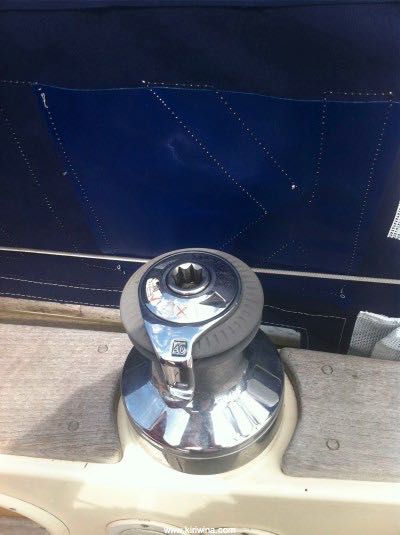
All halyards now run.
Last December en route to Rio Grande the original TecSew dodgers blew out in a gale.
I sourced new ones from Dansk Canvas in Buenos Aires.

Reinforcement adjacent to the winches. The original dodgers had velcroed flaps here which I found impractical and didn't use.
Added pockets for little things.
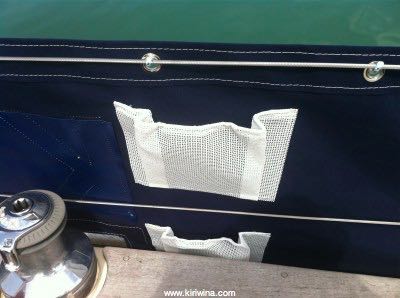
Only the sprayhood remains from the original canvas wardrobe. It might last another year.
Last December en route to Rio Grande the original TecSew dodgers blew out in a gale.
I sourced new ones from Dansk Canvas in Buenos Aires.
Reinforcement adjacent to the winches. The original dodgers had velcroed flaps here which I found impractical and didn't use.
Added pockets for little things.
Only the sprayhood remains from the original canvas wardrobe. It might last another year.
Piriapolis Rigging
08/10/11 15:33
All calm again this morning. Ran most of the halyards before breaking for a very long lunch.
Heavy Rain
07/10/11 20:49
Very heavy rain today and this afternoon we had a full N/NE gale with winds gusting to F10.
On the big boat moorings movement was very violent and even in the more sheltered inner basin I ran out an extra line.
No work outside but it looks as though I have another deck head leak above the heads sink. Stripped back the trim and lining to find some damp but the source of the leak remained elusive.
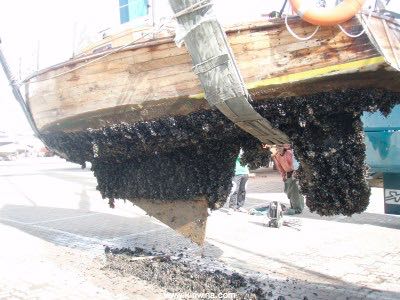
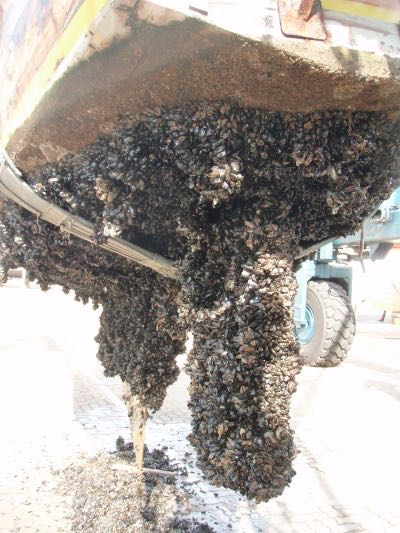
Priapolis - Grapnel
06/10/11 22:51
I borrowed a good grapnel today. Ten minutes dragging was enough to recover my shore power adaptor along with some old oilies and a bunch of fishing line.
After 30 hours underwater some corrosion had started but it cleaned up well. Fingers crossed.

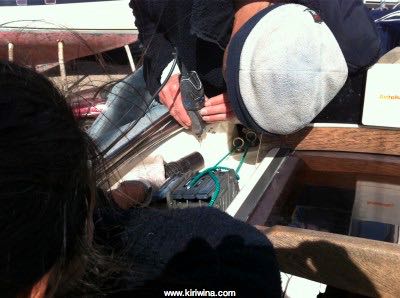
There are quite a few seals in Piriapolis and they like to bask in the sun. To this end some of them jump over a metre onto the deck of this dinghy. Impressive.
After 30 hours underwater some corrosion had started but it cleaned up well. Fingers crossed.
There are quite a few seals in Piriapolis and they like to bask in the sun. To this end some of them jump over a metre onto the deck of this dinghy. Impressive.
More Cleaning
05/10/11 22:40
Good weather again today.
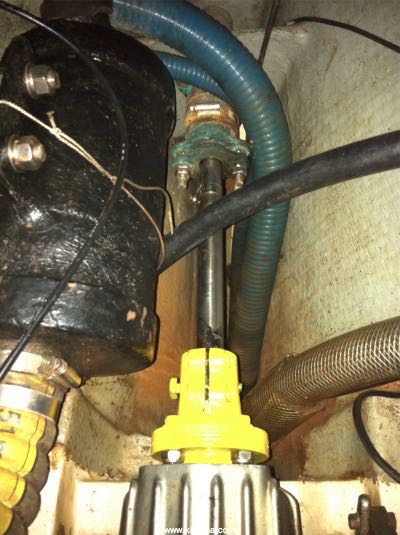
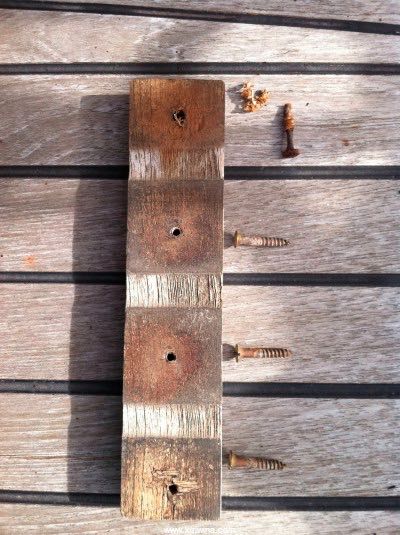
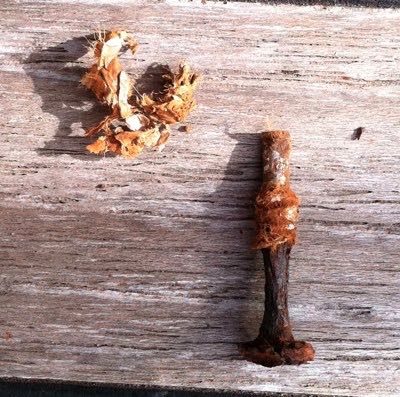
Fitted a new tiller securing bolt to replace the one that cracked. I had it drilled in Buenos Aries and it fitted perfectly.
Afterwards I finished washing the lines and halyards.
Very sad to hear that Steve Jobs died this evening.
Fitted a new tiller securing bolt to replace the one that cracked. I had it drilled in Buenos Aries and it fitted perfectly.
Afterwards I finished washing the lines and halyards.
Very sad to hear that Steve Jobs died this evening.
Halyard Cleaning
04/10/11 21:33
Lovely fine day in Piriapolis and flat calm.
After a run ashore to organise a sim card I started to wash and rinse all halyards and lines. Always surprising how much dirt comes out of them.
At midnight, after organising a shore power connection, I managed to drop an adaptor in the water. Got a finger to it but just too late as it sank. Oh well will try and drag tomorrow.
Back to Piriapolis
03/10/11 23:17
Early start this morning to catch a Cacciola ferry to Carmelo with a connecting coach to Montevideo.
A lovely day for travel. Sunny but not too hot. The trip to Carmelo takes about two and a half hours. Customs and immigration at Carmelo were, as usual, slow and more time was lost en route. In the event I missed my connecting coach to Piriapolis by 2 minutes.
No problem. Another service left an hour later. COPSA run chinese made Yutong coaches. Curious when Uruguay sits between Brazil and Argentina both of whom have high volume coach manufacturers.
All well in Piriapolis. With no adjacent boat I needed to borrow a dinghy to get on board.
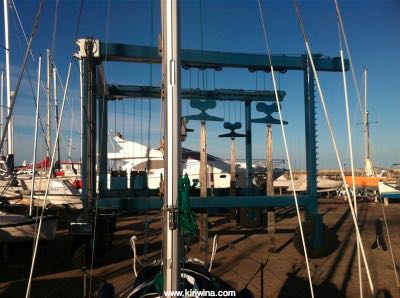
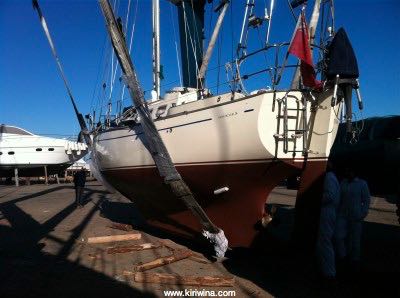
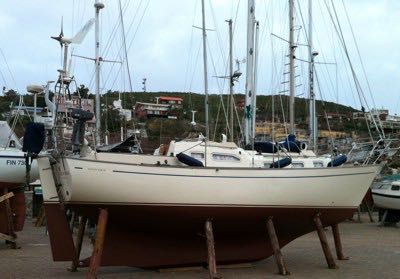
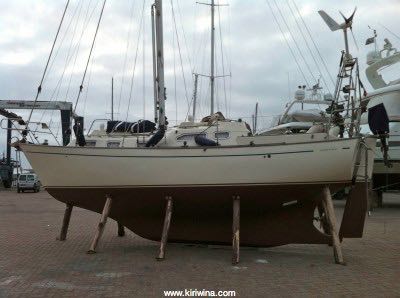
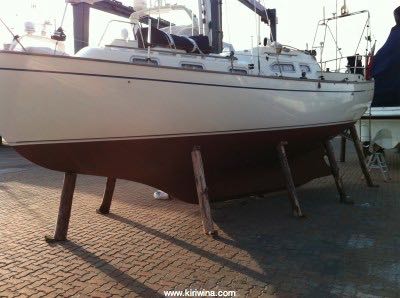
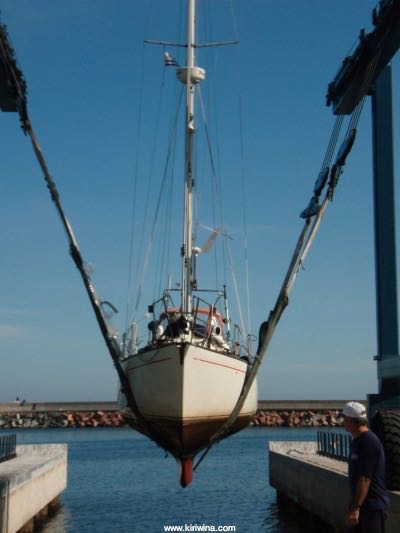
Piriapolis - Launch Day
11/08/11 00:25
An absolutely perfect day for launching. Flat calm, sunny and no wind.
I had been told to be on hand at 08:30. I was, but nobody else was there. Around 08:45 Walter, the yard manager showed up and asked if we were ready to go. We were.
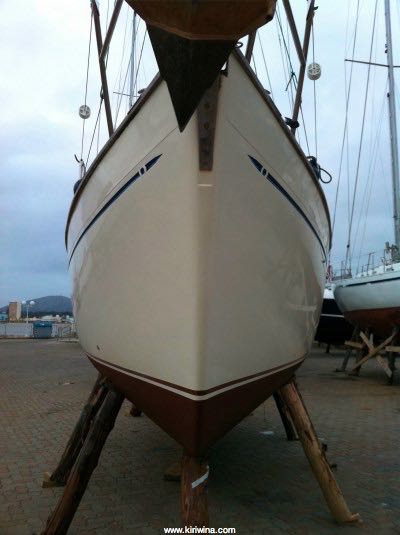
Bow at haul out in May...
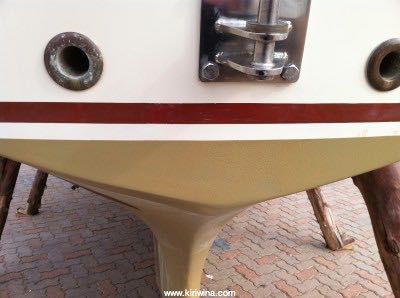
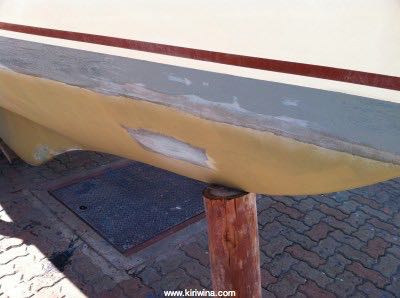
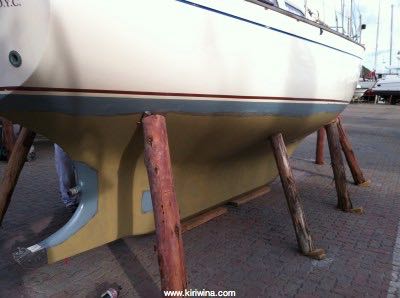
About 3cm of red gelcoat at the waterline was ground back to the laminate and replaced by epoxy, effectively raising the waterline by 3cm.
...and today.
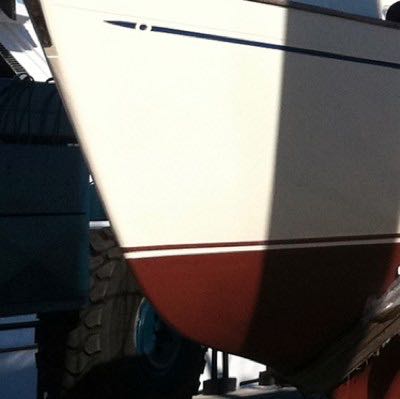
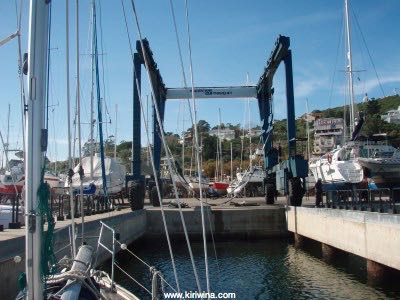
Travel lift moving into position at 09:10.
Slings on and weight taken. The slings here are not particularly clean and marked the topsides during haul out. I took the precaution of having some thick plastic sheeting on hand to wrap the slings. Steel sling pins were also a hazard so Laurence wrapped them in cloth.
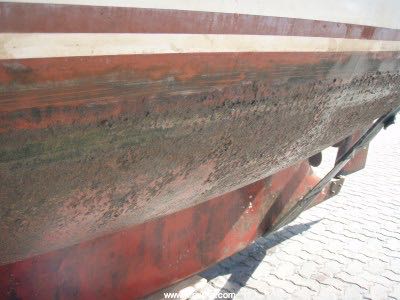
Last minute touching up of prop spots and keel base.

09:45 and we were all set.

This is a 90 ton travel lift. Kiriwina is around 4.5 tons.
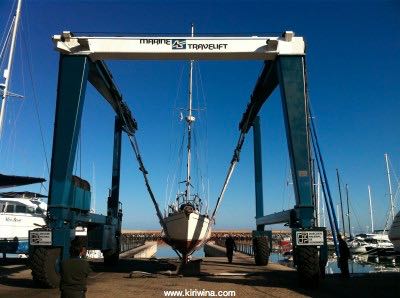
Lining Up.
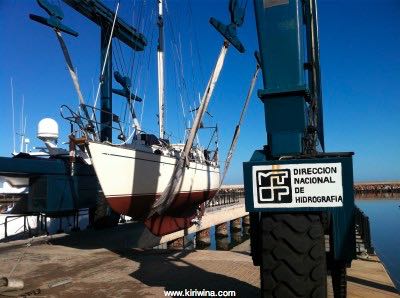
In we go.
Laurence and some of the Hidrografia team.
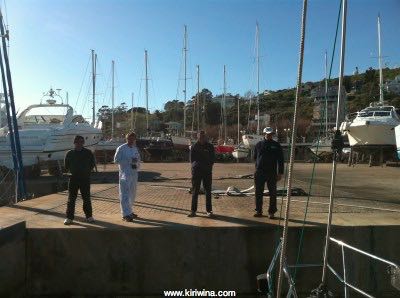
Ian and Elisa, our port crew.
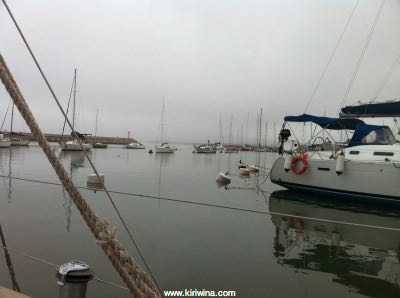
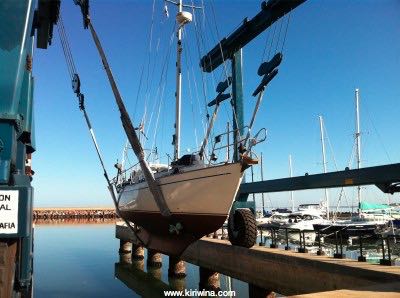
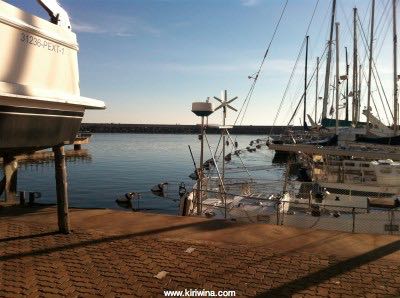
A very tranquil Piriapolis harbour.
Launching dock.
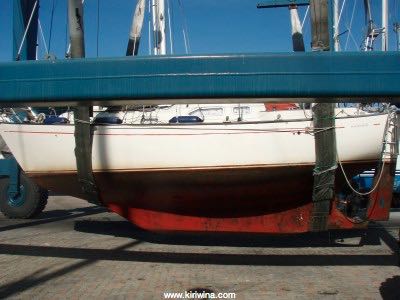
A photo opportunity with the skipper. At this point we were shipping water rather faster than was desirable. The cause, discovered later, was a pre-launch dummy log placement malfunction.
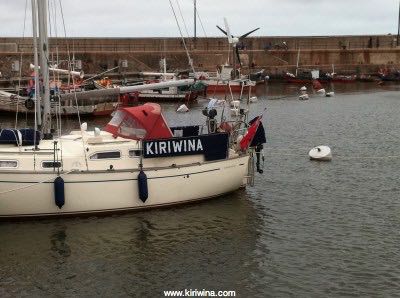
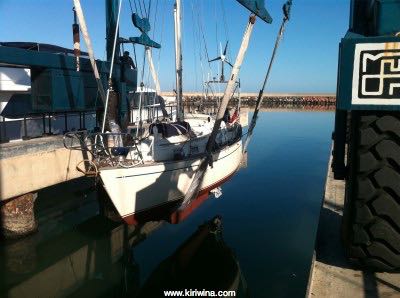
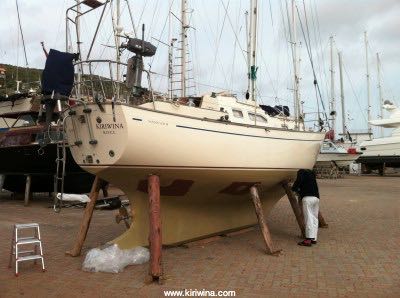
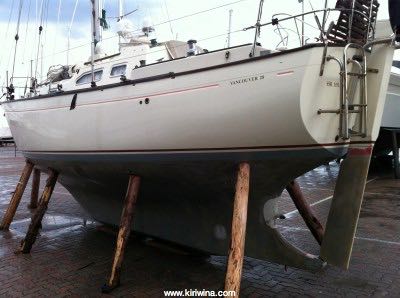
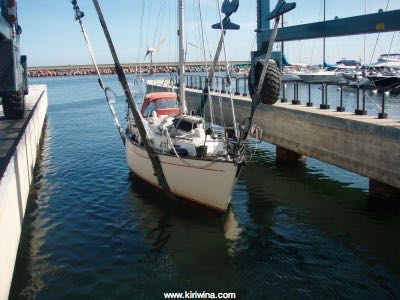
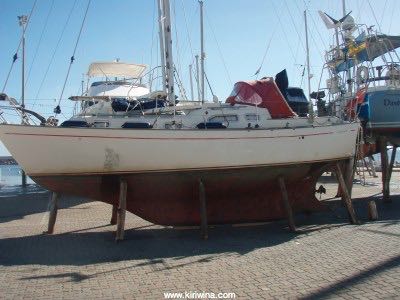
All fast in our allocated berth at 10:20. This was well into the harbour and more sheltered than our berth in May. Stern buoys were much closer to the dock making for a much better and more secure mooring
Kiriwina lying safely in her berth. She will spend 6-9 weeks here before we return to Brazil in the spring.
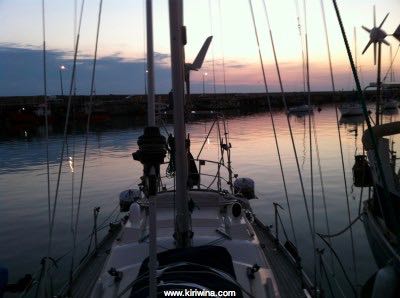
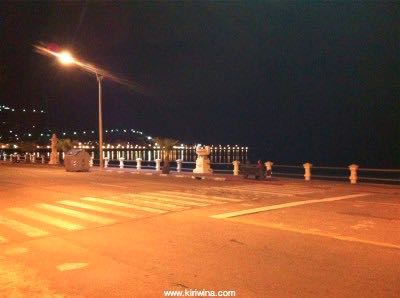
Piriapolis waterfront at 22:45. Sea calm. Wind zero knots.
I had been told to be on hand at 08:30. I was, but nobody else was there. Around 08:45 Walter, the yard manager showed up and asked if we were ready to go. We were.
Bow at haul out in May...
About 3cm of red gelcoat at the waterline was ground back to the laminate and replaced by epoxy, effectively raising the waterline by 3cm.
...and today.
Travel lift moving into position at 09:10.
Slings on and weight taken. The slings here are not particularly clean and marked the topsides during haul out. I took the precaution of having some thick plastic sheeting on hand to wrap the slings. Steel sling pins were also a hazard so Laurence wrapped them in cloth.
Last minute touching up of prop spots and keel base.
09:45 and we were all set.
This is a 90 ton travel lift. Kiriwina is around 4.5 tons.
Lining Up.
In we go.
Laurence and some of the Hidrografia team.
Ian and Elisa, our port crew.
A very tranquil Piriapolis harbour.
Launching dock.
A photo opportunity with the skipper. At this point we were shipping water rather faster than was desirable. The cause, discovered later, was a pre-launch dummy log placement malfunction.
All fast in our allocated berth at 10:20. This was well into the harbour and more sheltered than our berth in May. Stern buoys were much closer to the dock making for a much better and more secure mooring
Kiriwina lying safely in her berth. She will spend 6-9 weeks here before we return to Brazil in the spring.
Piriapolis waterfront at 22:45. Sea calm. Wind zero knots.
Piriapolis Boatyard Day 20
10/08/11 21:51
Definitely the final day in the boatyard.
We were in the yard early and ready to launch in moderate weather conditions. Sadly, a large supply vessel launched yesterday had suffered an engine malfunction and was unable to move from the haul out dock.
It eventually sailed around 13:00 but by then the wind had increased and the travel lift crew had disappeared. They were not seen for the rest of the day. Tango India Uniform.
Never mind. We used the extra time to complete some gelcoat repairs and in another outbreak of mission creep embarked on a few more.
Elisa drying some gelcoat.
Since I took delivery of Kiriwina in 2005 there have been a number of gelcoat flaws. This one is on the bridge deck.
The cause is space between gelcoat and laminate. When the laminate is applied during construction gaps can be left when the laminate is not properly laid onto gelcoat. This is more likely to occur in tight spaces.
A close up on the bridge deck. Loose gelcoat has been partially ground away to expose the laminate.
Laurence wielding his Dremel with surgical precision. Elisa is hoovering the dust.
Ready for new geloat.
Here the problem is repeated in the cockpit adjacent to the fuel filler. Back in 2006 a similar problem developed at the mast heel.
Cleaned up and ready for new gelcoat.
And again. This time in the starboard forward cockpit corner.
Ready.
I did this. Holes to mount a support pole for the Superwind. Arrangement did not work and was abandoned in favour of an A frame.
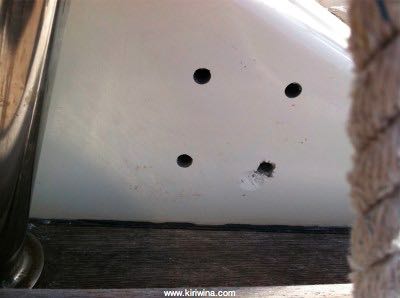
Dremeled.
We were in the yard early and ready to launch in moderate weather conditions. Sadly, a large supply vessel launched yesterday had suffered an engine malfunction and was unable to move from the haul out dock.
It eventually sailed around 13:00 but by then the wind had increased and the travel lift crew had disappeared. They were not seen for the rest of the day. Tango India Uniform.
Never mind. We used the extra time to complete some gelcoat repairs and in another outbreak of mission creep embarked on a few more.
Elisa drying some gelcoat.
Since I took delivery of Kiriwina in 2005 there have been a number of gelcoat flaws. This one is on the bridge deck.
The cause is space between gelcoat and laminate. When the laminate is applied during construction gaps can be left when the laminate is not properly laid onto gelcoat. This is more likely to occur in tight spaces.
A close up on the bridge deck. Loose gelcoat has been partially ground away to expose the laminate.
Laurence wielding his Dremel with surgical precision. Elisa is hoovering the dust.
Ready for new geloat.
Here the problem is repeated in the cockpit adjacent to the fuel filler. Back in 2006 a similar problem developed at the mast heel.
Cleaned up and ready for new gelcoat.
And again. This time in the starboard forward cockpit corner.
Ready.
I did this. Holes to mount a support pole for the Superwind. Arrangement did not work and was abandoned in favour of an A frame.
Dremeled.
Piriapolis Boatyard Day 19
09/08/11 20:16
Final day in the boatyard.
Two coats of Hempel antifouling paint applied all over. Three coats at the waterline and on the rudder.
It only remains to antifoul under the yard props and keel once Kiriwina is in the travel lift tomorrow morning.
Gelcoat repairs more or less complete and coach house/cockpit polishing completed.
Hull brightwork polishing completed.
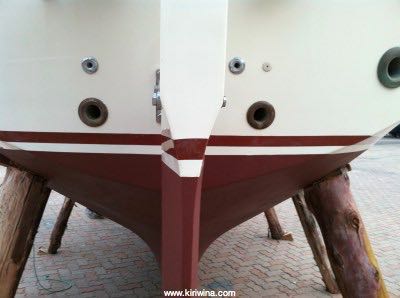
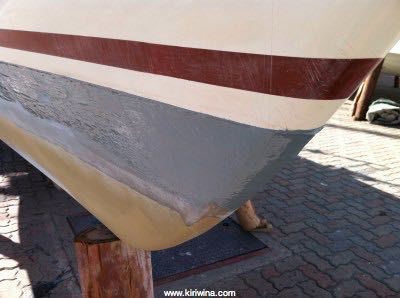
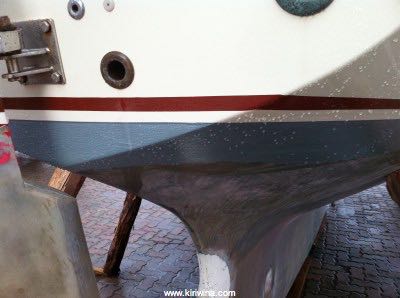
Precision alignment of new waterline on hull and rudder.
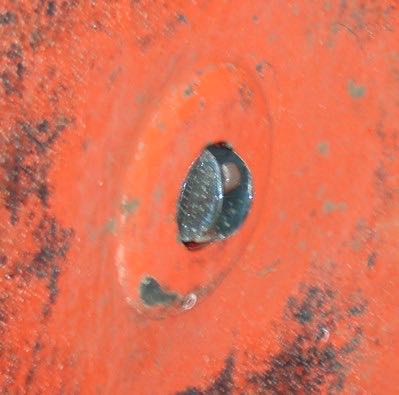
A new button anode was fitted in December 2007. At haul out in May 2011 this was about 50% degraded. This anode was about 20% degraded. Worth recycling.
The propeller was coated with waterproof grease and the stripper will receive one coat of antifoul tomorrow morning.
Adjacent boats reflected on Kiriwinna's freshly polished hull.
The hull anode shown here was also fitted in November 2007. With only 20% degradation it was cleaned up and reused.
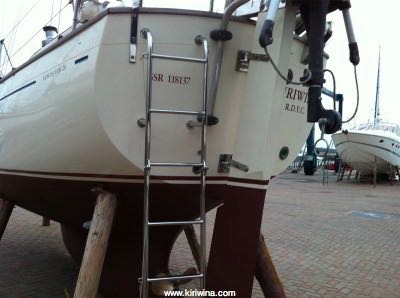
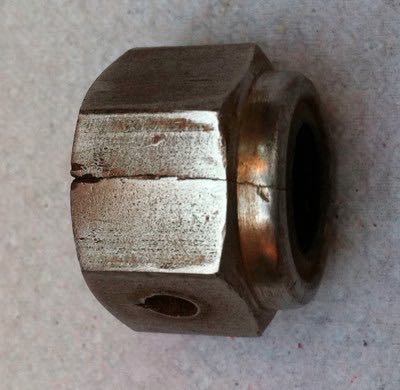
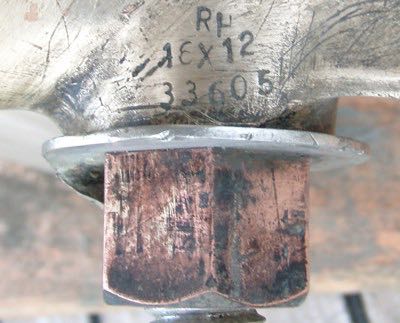
The rudder was secured with only one nut. Kiriwina will be moored in Piriapolis after launch and some new 21mm stainless steel nuts will be sourced and drilled in Buenos Aires. Rudder cap and tiller reinstalled.
Fenders deployed ready for launch.
Two coats of Hempel antifouling paint applied all over. Three coats at the waterline and on the rudder.
It only remains to antifoul under the yard props and keel once Kiriwina is in the travel lift tomorrow morning.
Gelcoat repairs more or less complete and coach house/cockpit polishing completed.
Hull brightwork polishing completed.
Precision alignment of new waterline on hull and rudder.
A new button anode was fitted in December 2007. At haul out in May 2011 this was about 50% degraded. This anode was about 20% degraded. Worth recycling.
The propeller was coated with waterproof grease and the stripper will receive one coat of antifoul tomorrow morning.
Adjacent boats reflected on Kiriwinna's freshly polished hull.
The hull anode shown here was also fitted in November 2007. With only 20% degradation it was cleaned up and reused.
The rudder was secured with only one nut. Kiriwina will be moored in Piriapolis after launch and some new 21mm stainless steel nuts will be sourced and drilled in Buenos Aires. Rudder cap and tiller reinstalled.
Fenders deployed ready for launch.
Piriapolis Boatyard Day 18
08/08/11 21:30
Six years with Kiriwina! I took delivery at Itchenor on 8th August 2005.
First thing this morning the new waterline was given a final sanding and then tie coated as were other areas made good.
This is very good work. Imperial Yachts have taken great care to do the job thoroughly with a tight schedule and often inclement weather.
The waterline before work started.
The boat yard shuffled the deck today and we were moved at 14:00. We took the opportunity of putting the launch back by 24 hours. Just in case.
Areas adjacent to the props were anti-fouled last night so the props could be repositioned slightly ensuring all areas of the hull are fully painted.

Some final tie coating before the first coat of anti fouling.
Meantime I finished cleaning and freeing up 6 A frame clamps on the Pushpit.
Brightwork polishing is coming along.
Another long, but very productive, day. The second coat of antifouling was completed in fading light.

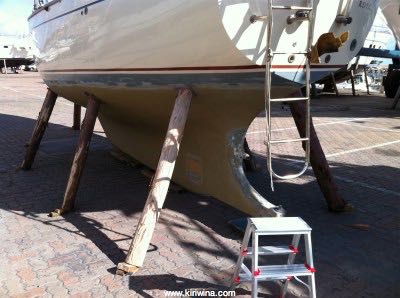
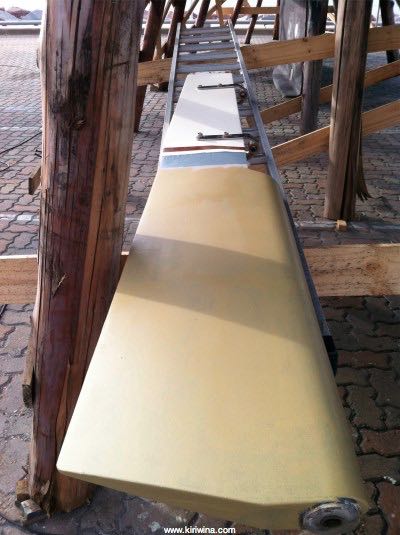
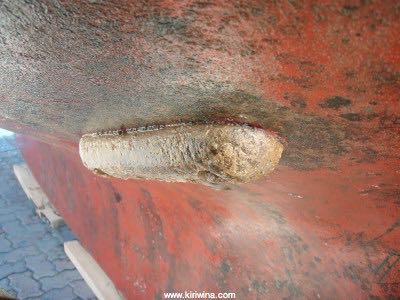
Refurbished skeg and rudder heel.
We are almost done. Just some detailing here and there, some polishing, a bit of touching up on the anti fouling, anodes, rudder tiller assembly and we will be pretty much good to go.
First thing this morning the new waterline was given a final sanding and then tie coated as were other areas made good.
This is very good work. Imperial Yachts have taken great care to do the job thoroughly with a tight schedule and often inclement weather.
The waterline before work started.
The boat yard shuffled the deck today and we were moved at 14:00. We took the opportunity of putting the launch back by 24 hours. Just in case.
Areas adjacent to the props were anti-fouled last night so the props could be repositioned slightly ensuring all areas of the hull are fully painted.
Some final tie coating before the first coat of anti fouling.
Meantime I finished cleaning and freeing up 6 A frame clamps on the Pushpit.
Brightwork polishing is coming along.
Another long, but very productive, day. The second coat of antifouling was completed in fading light.
Refurbished skeg and rudder heel.
We are almost done. Just some detailing here and there, some polishing, a bit of touching up on the anti fouling, anodes, rudder tiller assembly and we will be pretty much good to go.
Piriapolis Boatyard Day 17
07/08/11 21:30
Cloudy, windy and cooler today.
We are booked to launch on Tuesday. Laurence and Elise from Imperial Yachts are working all weekend to ensure we will be ready.
With the new waterline now true a final coat of epoxy resin was carefully applied.
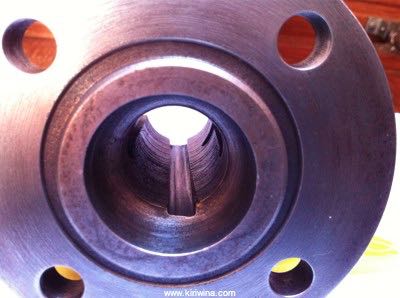
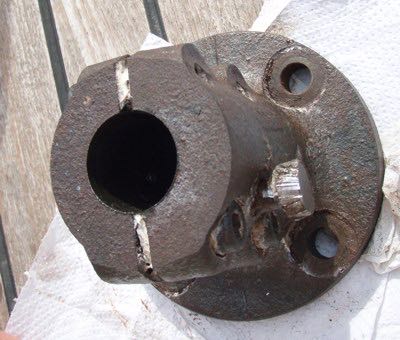
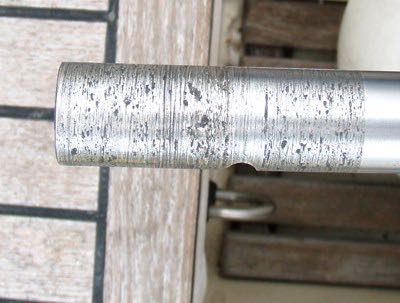
Newly refurbished shaft coupling with propeller shaft in situ. This was very good work. With the woodruff key in place the shaft slid home cleanly and the retaining pin located perfectly within the shaft recess.
My fourth tender bag since leaving England in 2006. The first, as supplied by Suzumar, tore the first time it was lifted. It was also too small. The second, donated in Spain late in 2006, also tore within a few weeks. The third I had made in Puerto Sherry in 2007. This gave good service but earlier this year the straps broke. Destroyed by UV.
This new bag, from Dansk Canvas in San Fernando, Argentina incorporates a number of improvements. Large tooth nylon zipper with protective flap. Highest quality american UV resistant thread and UV resistant white webbing.
One never knows what will come to light while cleaning. The rudder is secured by two 21mm bolts.
This one was cracked nearly all the way through.
We are booked to launch on Tuesday. Laurence and Elise from Imperial Yachts are working all weekend to ensure we will be ready.
With the new waterline now true a final coat of epoxy resin was carefully applied.
Newly refurbished shaft coupling with propeller shaft in situ. This was very good work. With the woodruff key in place the shaft slid home cleanly and the retaining pin located perfectly within the shaft recess.
My fourth tender bag since leaving England in 2006. The first, as supplied by Suzumar, tore the first time it was lifted. It was also too small. The second, donated in Spain late in 2006, also tore within a few weeks. The third I had made in Puerto Sherry in 2007. This gave good service but earlier this year the straps broke. Destroyed by UV.
This new bag, from Dansk Canvas in San Fernando, Argentina incorporates a number of improvements. Large tooth nylon zipper with protective flap. Highest quality american UV resistant thread and UV resistant white webbing.
One never knows what will come to light while cleaning. The rudder is secured by two 21mm bolts.
This one was cracked nearly all the way through.
Piriapolis Boatyard Day 16
06/08/11 21:29
A really lovely day in Piriapolis.
Flat calm and sunny.
A sailboat leaving Piriapolis harbour for a drift about.
Meantime work continued. Four coats of epoxy resin have been used to make good the faulty red gelcoat the waterline. Today this resin was sanded to form.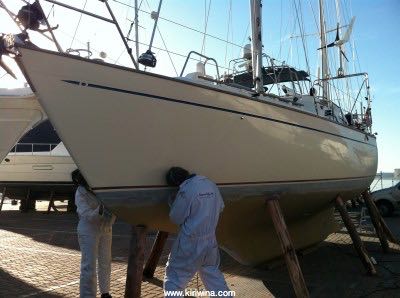
Then minor imperfections were made good with epoxy filler (yellow).
Flat calm and sunny.
A sailboat leaving Piriapolis harbour for a drift about.
Meantime work continued. Four coats of epoxy resin have been used to make good the faulty red gelcoat the waterline. Today this resin was sanded to form.
Then minor imperfections were made good with epoxy filler (yellow).
Piriapolis Boatyard Day 14
04/08/11 21:30
No work yesterday due to a SE gale and heavy rain.
This morning we moved onto the final stages of epoxy buildup on the waterline and areas of hull which required refinishing.
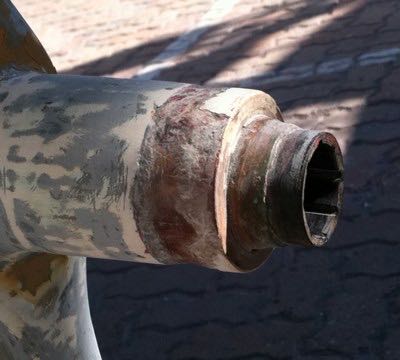
Stern tube showing somewhat agricultural modifications to accommodate the Stripper rope cutter. Gelcoat and laminate have been hacked away unevenly with the stern tube exposed in places. We cannot source a neoprene cutlass bearing here so the original will have to suffice.
Epoxy resin almost complete and we now have a smart new step ladder replacing the one that failed on tuesday. Tie coat has been applied most of the hull.
Epoxy sanded back and surface filler applied to skeg and stern tube area.
Surface filler to complete refinishing of hull blemish.
Final touches to another blemish near the starboard bow.
Epoxy resin waterline reconstruction at the bow.
Gelcoat repairs to chips, blemishes and scratches at the bow caused by unplanned anchor contacts.
This morning we moved onto the final stages of epoxy buildup on the waterline and areas of hull which required refinishing.
Stern tube showing somewhat agricultural modifications to accommodate the Stripper rope cutter. Gelcoat and laminate have been hacked away unevenly with the stern tube exposed in places. We cannot source a neoprene cutlass bearing here so the original will have to suffice.
Epoxy resin almost complete and we now have a smart new step ladder replacing the one that failed on tuesday. Tie coat has been applied most of the hull.
Epoxy sanded back and surface filler applied to skeg and stern tube area.
Surface filler to complete refinishing of hull blemish.
Final touches to another blemish near the starboard bow.
Epoxy resin waterline reconstruction at the bow.
Gelcoat repairs to chips, blemishes and scratches at the bow caused by unplanned anchor contacts.
Piriapolis Boatyard Day 12
02/08/11 22:09
Weather fine and cold but still lots of progress today. One week to launch.
Most of the hull was painted with Hempel tie coat leaving only the epoxied areas. The second and third coats of epoxy resin were applied to the waterline.
Similar treatment on the rudder.
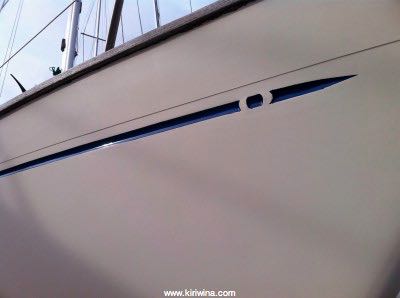
A new navy blue coach line.
Refurbished and modified shaft coupling reinstalled.
Today's mission creep. Looks like the cutlass bearing has excessive play. Two small problems. Can we get a new one? Can we get the old one out cleanly?
A long spell ashore allows time for smaller repairs as well.
There are 41 brass screws in the cockpit grating and one mild steel.
Good thinking. Use a mild steel under sized screw and flimsy packing so it will grip. All in a grate frequently in contact with salt water.
This is what happens when wet locker hooks are not stainless steel.
Today's equipment malfunction. Our one week old step ladder failed.
Most of the hull was painted with Hempel tie coat leaving only the epoxied areas. The second and third coats of epoxy resin were applied to the waterline.
Similar treatment on the rudder.
A new navy blue coach line.
Refurbished and modified shaft coupling reinstalled.
Today's mission creep. Looks like the cutlass bearing has excessive play. Two small problems. Can we get a new one? Can we get the old one out cleanly?
A long spell ashore allows time for smaller repairs as well.
There are 41 brass screws in the cockpit grating and one mild steel.
Good thinking. Use a mild steel under sized screw and flimsy packing so it will grip. All in a grate frequently in contact with salt water.
This is what happens when wet locker hooks are not stainless steel.
Today's equipment malfunction. Our one week old step ladder failed.
Piriapolis Boatyard Day 7
28/07/11 19:55
Cold with rain showers during the morning.
"Stripper" rope cutter cleaned and ready for installation.
Continued painting the engine mounts.
Engine side of the shaft coupling after first coat.
No further work on the hull but the first coat of epoxy has set well.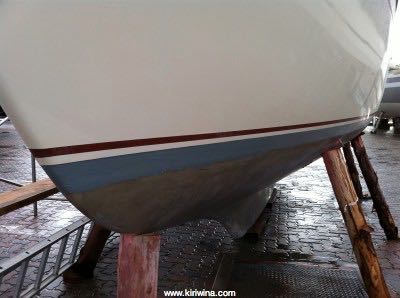
"Stripper" rope cutter cleaned and ready for installation.
Continued painting the engine mounts.
Engine side of the shaft coupling after first coat.
No further work on the hull but the first coat of epoxy has set well.
Piriapolis, Boatyard Day 6
27/07/11 23:24
Rapid progress with removing the gelcoat and the first coat of epoxy resin was applied.
I started cleaning up the engine mounts which have become badly corroded. Firstly though, I removed the Yanmar water pump to change the impeller. This particular impeller has done sterling service. Fitted in September 2006 it has done some 800 hours and looked in perfect condition.
One downside of leaving the impeller this long is that it was very difficult to remove. Over two hours with WD40 and gentle levering. In future I'll try to take advantage of impeller longevity but remove and inspect at much shorter intervals.
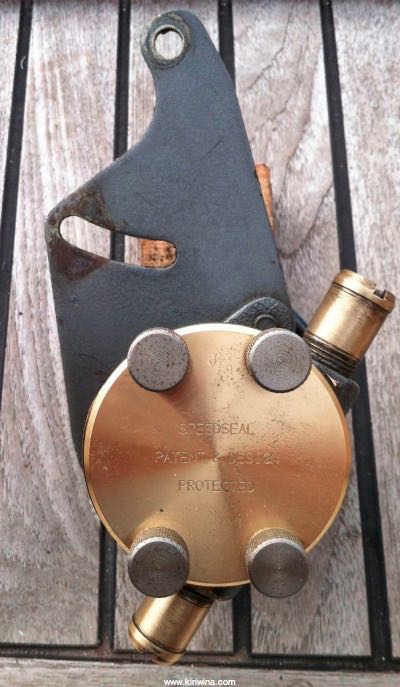
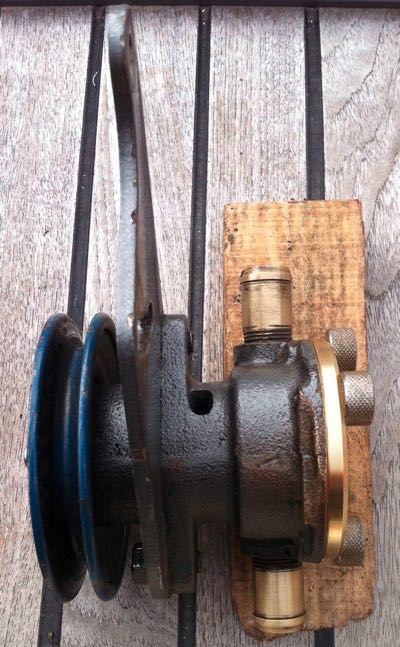
Meantime I fitted an upgraded water pump Speedseal with run-dry option.

I started cleaning up the engine mounts which have become badly corroded. Firstly though, I removed the Yanmar water pump to change the impeller. This particular impeller has done sterling service. Fitted in September 2006 it has done some 800 hours and looked in perfect condition.
One downside of leaving the impeller this long is that it was very difficult to remove. Over two hours with WD40 and gentle levering. In future I'll try to take advantage of impeller longevity but remove and inspect at much shorter intervals.
Meantime I fitted an upgraded water pump Speedseal with run-dry option.
Piriapolis, Boatyard Day 5
26/07/11 23:24
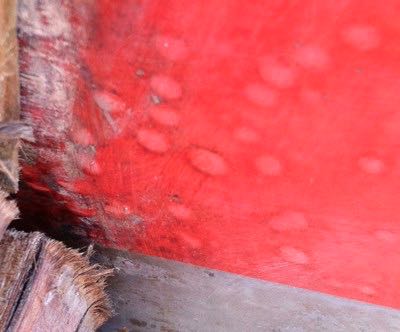
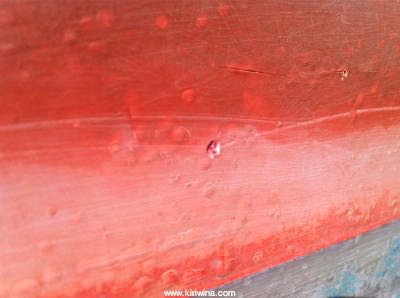
Bad news day today. The blisters we noted on day two are more serious.
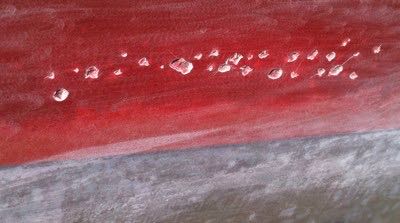
What seems to have happened is that water has penetrated the red waterline gelcoat. This gelcoat contains a large number of air pockets which fill with water. A reaction takes place and bubbles form in the gelcoat. When pricked some of these bubbles still contained water though many were dry. Fortunately none had penetrated the laminate.
There are a number of causes. A fully kitted cruising yacht will lie lower in the water submerging much of the red gelcoat. Poorly applied gelcoat allowing air pockets to form, red gelcoat being inherently weaker and more prone to UV damage and Kiriwina navigating in warmer waters for much of the past 4 years.
What to do? Leave it, sand down blisters, fill and paint or solve the problem. Solving the problem means grinding back all the waterline red gelcoat, building up with epoxy resin and finishing with epoxy filler. I chose to solve the problem.
Thereafter the water line will be raised by the width of the red gelcoat and anti fouled in the usual way.
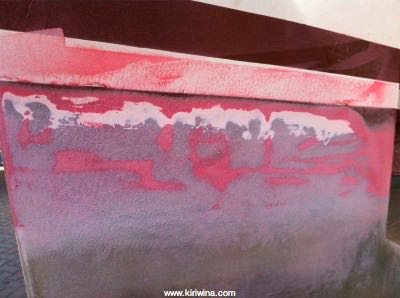
Laurence cracked on rapidly and by nightfall half the red gelcoat had been ground away.
Repairs to the aft keel were completed but water is still dripping out. Seacocks reinstalled.
What seems to have happened is that water has penetrated the red waterline gelcoat. This gelcoat contains a large number of air pockets which fill with water. A reaction takes place and bubbles form in the gelcoat. When pricked some of these bubbles still contained water though many were dry. Fortunately none had penetrated the laminate.
There are a number of causes. A fully kitted cruising yacht will lie lower in the water submerging much of the red gelcoat. Poorly applied gelcoat allowing air pockets to form, red gelcoat being inherently weaker and more prone to UV damage and Kiriwina navigating in warmer waters for much of the past 4 years.
What to do? Leave it, sand down blisters, fill and paint or solve the problem. Solving the problem means grinding back all the waterline red gelcoat, building up with epoxy resin and finishing with epoxy filler. I chose to solve the problem.
Thereafter the water line will be raised by the width of the red gelcoat and anti fouled in the usual way.
Laurence cracked on rapidly and by nightfall half the red gelcoat had been ground away.
Repairs to the aft keel were completed but water is still dripping out. Seacocks reinstalled.
Piriapolis, Boatyard Day 4
25/07/11 23:52
Strong winds today. Up to 30 knots with heavy rain forecast later tonight. With this amount of wind the rudder was banging against the Aires frame and had to be lashed.
No work on the hull today. Both Blakes seacocks were polished and the through hulls cleaned ready for greasing and reassembly. The shaft coupling received a fourth and final coat of paint.
In the morning acidy water was still slowly dripping from the hole drilled in the underside of the keel just forward of the rudder. By later afternoon it had stopped. Whether this is due to all the water having drained out or the drying effect of strong warm winds I am not sure.
Piriapolis, Boatyard Day 3
24/07/11 23:51
Third coat on the shaft coupling.
Work began on the aft end of the keel. I suspect, but cannot know for sure, that this problem arose as a result of less than optimum work when Kiriwina was built. The aft end of the keel appears to comprise two vertical sections glued/bonded together with a robust end cap incorporating the rudder heel.
The bonding process appears not to be complete with a hairline gap allowing water into the keel. There is evidence of filler being used to smooth irregularities in the join.
Firstly, to see exactly what we were dealing with, the crack was opened up a little with a grinder and then washed with acetone. Ideally the boat would be left ashore until the damaged area was completely dry before attempting repairs. This was not possible.
The repair plan involves an area around the crack being ground down to a dept of 2-3mm. Then resin/silica filler will be applied to the crack giving a good bonding surface,
for three layers of fibreglass, mat/woven/mat bound by epoxy resin.
All done! The work took a couple of hours.
This repair is intended to seal and bind the crack. While it appears that the problem is stable any sign of the crack spreading into the new material will indicate otherwise. Before launch the two drain holes drilled into the underside of the keel will be filled with epoxy and sealed. With no more water getting in any residual water can be allowed to drain by drilling the epoxy next time Kiriwina is hauled out.
Later a repair from 2006 was found to have been poorly done with an excess of filler applied on top of antifouling.
Polishing continued on the starboard side and was completed by the end of the day.
Piriapolis, Boatyard Day 2
23/07/11 23:50
Another fine and sunny day began with a second coat on the shaft coupling. Waxing and polishing was begun on the port topsides.
A closer examination of the now stripped hull revealed a number of hopefully small problems. Our mission creep has started.
With Kiriwina being loaded down with cruising gear her waterline has moved up some 2-3 centimetres. This meant her red gelcoat coach line has been partially submerged. With red gelcoat being more porous than cream, water has penetrated and small blisters have appeared on the rudder and along the hull. I hope that these have formed only under the red gelcoat and water has not gone deeper.
Kiriwina was last hauled out and antifouled in December 2007. At that time I noticed an imperfection at the aft end of the keel. It seemed ok and I did not investigate further.
This time, with all the paint removed it was obvious there was a fine crack in the keel which was allowing water to enter the structure.
After more than two months ashore there was still a slight water seepage from underneath the keel.
Piriapolis, Boatyard Day 1
22/07/11 23:49
I was down at the yard by 09:30. There is quite a lot to do before our target launch date of Friday 5th August. Major work is being carried out by local contractors, Imperial Yachts.
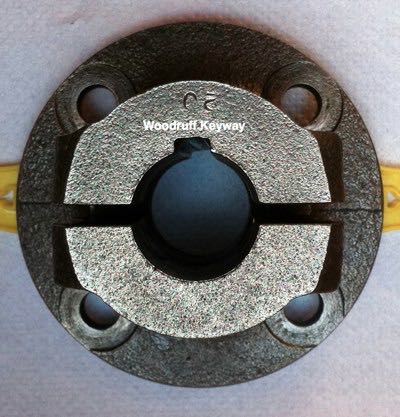
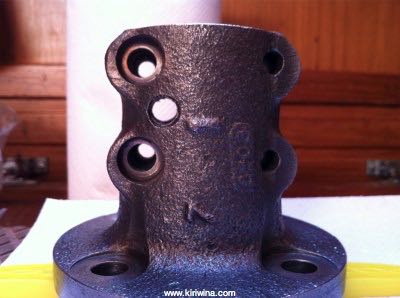
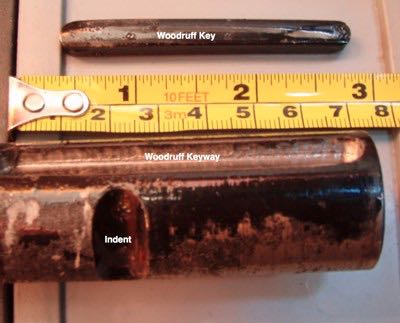
The shaft coupling, nicely shot blasted, was back on board having been modified to ABYC (American Boat and Yacht Council) standards. At build the shaft was secured within the coupling by four allen bolts and a rolled pin locating in an indent on the shaft.
After the first failure, in 2006, a grub screw was added and a new rolled pin fitted by a Yanmar dealer in Dartmouth. This, I was assured, would solve the problem.
It did until December 2010 when the coupling failed again. My temporary repair held until April this year in Piriapolis.
A proper analysis revealed that the rolled pin and indent barely matched. Only a small part of the pin diameter was locating in the indent. Modifications included properly matching the pin and indent and machining a woodruff keyway in the shaft and coupling. The shaft was tested and found to be true.
I applied the first of four coats of paint to the shaft coupling. Laurence and Elisa made excellent progress stripping the below waterline hull back to the gelcoat. They were using Bahco 650 Ergo scrapers and were finished by the end of the day.
I was extremely impressed with the Bahco 650 scrapers.
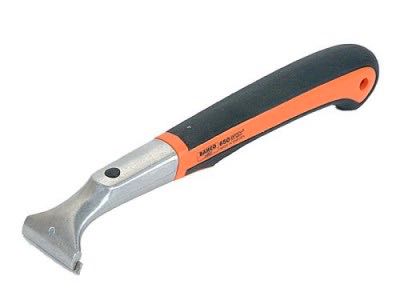
I had not seen Kiriwina stripped back to gelcoat. The hull was in excellent condition although I was surprised to see a number of somewhat agricultural examples of GRP work most likely dating from when she was built.
The shaft coupling, nicely shot blasted, was back on board having been modified to ABYC (American Boat and Yacht Council) standards. At build the shaft was secured within the coupling by four allen bolts and a rolled pin locating in an indent on the shaft.
After the first failure, in 2006, a grub screw was added and a new rolled pin fitted by a Yanmar dealer in Dartmouth. This, I was assured, would solve the problem.
It did until December 2010 when the coupling failed again. My temporary repair held until April this year in Piriapolis.
A proper analysis revealed that the rolled pin and indent barely matched. Only a small part of the pin diameter was locating in the indent. Modifications included properly matching the pin and indent and machining a woodruff keyway in the shaft and coupling. The shaft was tested and found to be true.
I applied the first of four coats of paint to the shaft coupling. Laurence and Elisa made excellent progress stripping the below waterline hull back to the gelcoat. They were using Bahco 650 Ergo scrapers and were finished by the end of the day.
I was extremely impressed with the Bahco 650 scrapers.
I had not seen Kiriwina stripped back to gelcoat. The hull was in excellent condition although I was surprised to see a number of somewhat agricultural examples of GRP work most likely dating from when she was built.
Back to Piriapolis
21/07/11 23:48
Punta del Este to Buenos Aires
10/07/11 15:37
Piriapolis maintenance
13/05/11 19:45
Another nice day.
This heavily fouled boat was hauled out by her new owner and placed ahead of Kiriwina.
The fouling hid greater problems. Most of the undewater planking is rotten and needs to be replaced.
I got on with cleaning up the prop and coupling. These will be taken to a machine shop in Montevideo for keyway cutting.
Prop details.
Prop shaft in way of failed coupling.
Haul-out
12/05/11 21:30
A lovely day today and the Hidrografia finally decided to haul Kiriwina out. That's two days of insurance lost.
At 10.55 I took Kiriwina round to the travel-lift dock.
The operatives did a good job. They were careful with Kiriwina and there were no problems.
Our last haul out was in December 2007. The hull looks really clean, especially when one recalls how fouled she became while in Brazil during 2008.

At 11:40 Kiriwina was left slung on the Travel-Lift while the operatives went off for lunch.
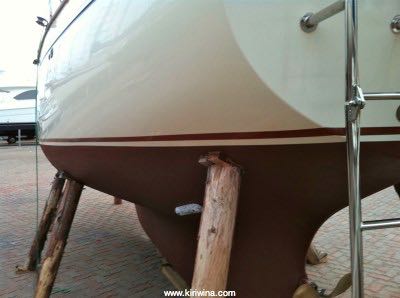
After lunch Kiriwina was lowered on to two wooden planks and chocked in position.

There was a fair amount of slime around the waterline but this came off easily. I refused the offer of a pressure wash.
Area adjacent to the log impeller showing just how clean the hull was. Sadly this cleanliness has next to nothing to do with the Jotun Nonstop antifouling (pretty useless) applied in the Canaries. What kept the hull clean was our alternating between salt and fresh water.
Main anode, still in pretty good shape.
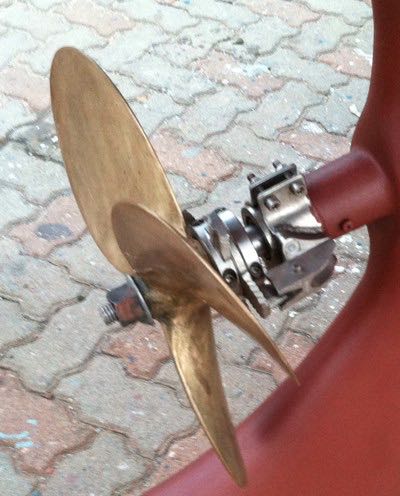
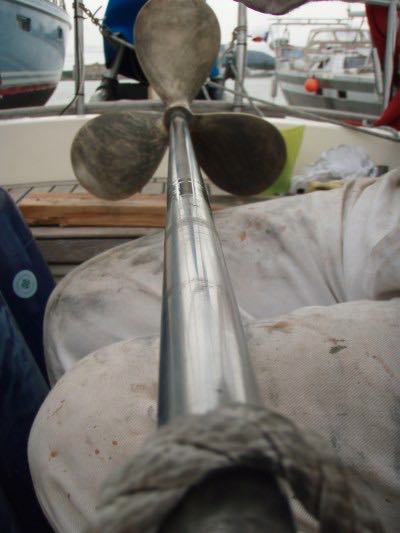
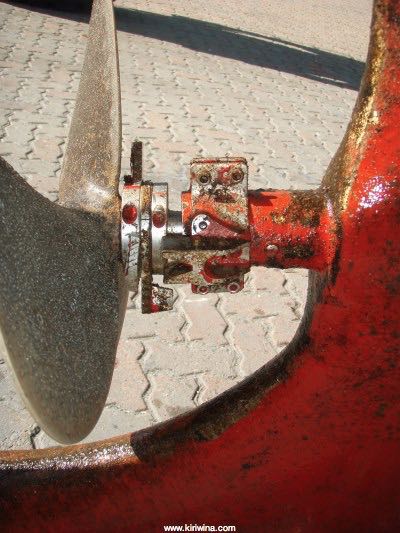
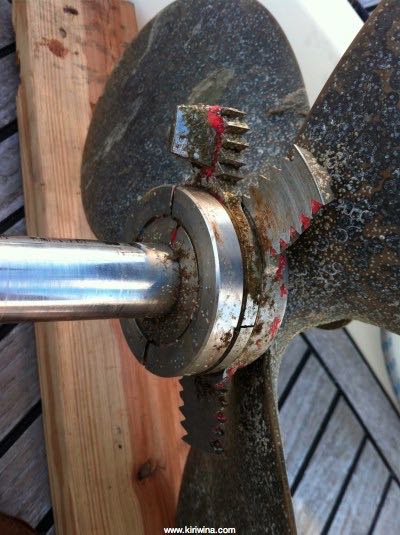
Propellor and stripper just out of the water.
The rudder was a bit more slimy. At some point blue antifoul had been applied to the rudder. This did not play well with later coats.
Time to take the rudder off and remove the prop shaft. Easy peasy. Remove the tiller, undo 2 x 21mm bolts and lift off. All done in less than 10 minutes.
Skeg with rudder removed.
Prop and stripper on deck awaiting cleaning.
At 10.55 I took Kiriwina round to the travel-lift dock.
The operatives did a good job. They were careful with Kiriwina and there were no problems.
Our last haul out was in December 2007. The hull looks really clean, especially when one recalls how fouled she became while in Brazil during 2008.
At 11:40 Kiriwina was left slung on the Travel-Lift while the operatives went off for lunch.
After lunch Kiriwina was lowered on to two wooden planks and chocked in position.
There was a fair amount of slime around the waterline but this came off easily. I refused the offer of a pressure wash.
Area adjacent to the log impeller showing just how clean the hull was. Sadly this cleanliness has next to nothing to do with the Jotun Nonstop antifouling (pretty useless) applied in the Canaries. What kept the hull clean was our alternating between salt and fresh water.
Main anode, still in pretty good shape.
Propellor and stripper just out of the water.
The rudder was a bit more slimy. At some point blue antifoul had been applied to the rudder. This did not play well with later coats.
Time to take the rudder off and remove the prop shaft. Easy peasy. Remove the tiller, undo 2 x 21mm bolts and lift off. All done in less than 10 minutes.
Skeg with rudder removed.
Prop and stripper on deck awaiting cleaning.
Failed departure from Piriapolis
08/05/11 21:30
Punta del Este to Piriapolis
29/04/11 21:31
After a very good sleep I inflated the dinghy and went ashore to pay mooring fees. On the way I was hailed by a german couple one of whom wanted a lift ashore. They were bound for Brazil and were waiting to take fuel.
We chatted a bit and it emerged that they were very cross with they way they had been treated at Piriapolis. Oh dear. We will be there tonight.
Formalities were a bit fiddly. I had to see immigration (Urg$125 for an entry stamp in my passport), customs, Prefectura and Hidrografia (Mooring Fee Urg$292).
Back on board it was 11:45 before I dropped the buoy and sailed for Piriapolis.
The wind was just north of east F4. Almost astern bight with slight seas it was very pleasant sailing.
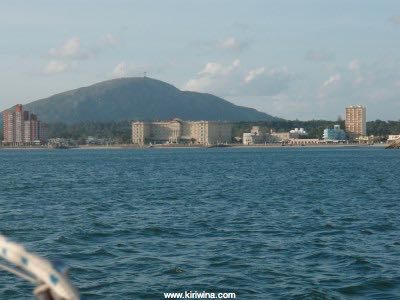
Passing Punta Ballena around 13:00. The white building is Casa Pueblo which we visited last November.
Punta del Este in the distance astern.
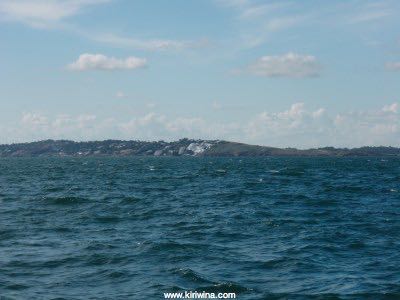
Approaching Piriapolis with Hotel Argentino and Pan de Azucar (1400 ft high with a 35m cross at the summit) at centre.
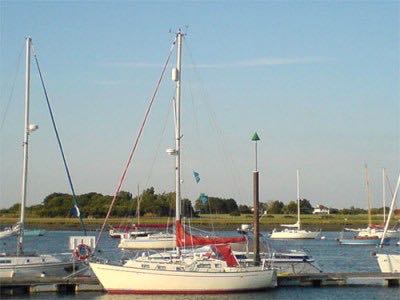
Later the wind increased to F5 but by 16:45 we were off Piriapolis. Once inside there appeared to be no vacant berths. I prepared lines and fenders and was beckoned to raft alongside a large french yacht, Grey Pearl, where we were all fast at 17:30.
Log 18.2 Miles. Track 22 Miles.
We chatted a bit and it emerged that they were very cross with they way they had been treated at Piriapolis. Oh dear. We will be there tonight.
Formalities were a bit fiddly. I had to see immigration (Urg$125 for an entry stamp in my passport), customs, Prefectura and Hidrografia (Mooring Fee Urg$292).
Back on board it was 11:45 before I dropped the buoy and sailed for Piriapolis.
The wind was just north of east F4. Almost astern bight with slight seas it was very pleasant sailing.
Passing Punta Ballena around 13:00. The white building is Casa Pueblo which we visited last November.
Punta del Este in the distance astern.
Approaching Piriapolis with Hotel Argentino and Pan de Azucar (1400 ft high with a 35m cross at the summit) at centre.
Later the wind increased to F5 but by 16:45 we were off Piriapolis. Once inside there appeared to be no vacant berths. I prepared lines and fenders and was beckoned to raft alongside a large french yacht, Grey Pearl, where we were all fast at 17:30.
Log 18.2 Miles. Track 22 Miles.
Rio Grande to Punta del Este
26/04/11 21:32
Colonia to Porto Alegre
11/04/11 21:59
Rio de la Plata HASH Day 2
10/04/11 21:58
Rio de la Plata HASH Day 1
09/04/11 21:58
Buenos Aires to Rio Grande
10/01/11 22:54
Cacciola ferry from Tigre to Carmelo, Uruguay and then on by coach to Montevideo.
Crowded Hidrografia moorings in Carmelo.
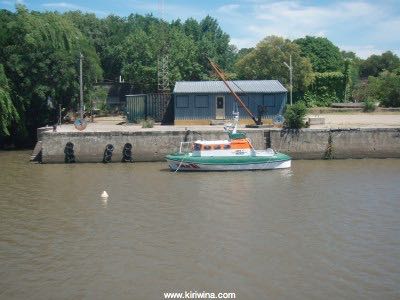
Carmelo lifeboat.
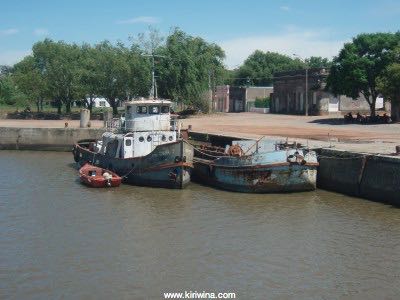
Aging tug and barge.
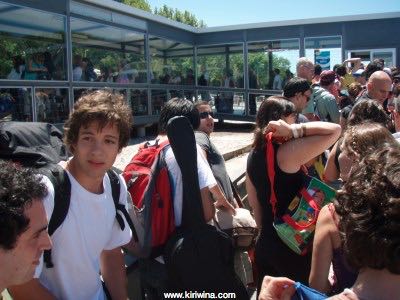
Very, very long queue for customs and immigration at Carmelo.
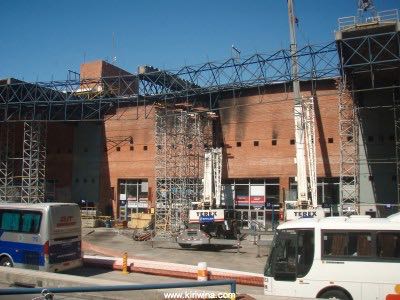
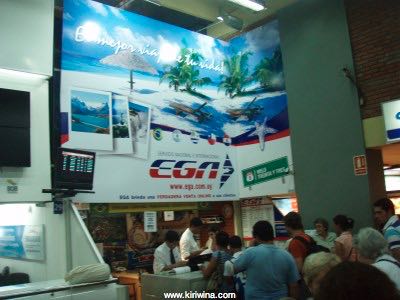
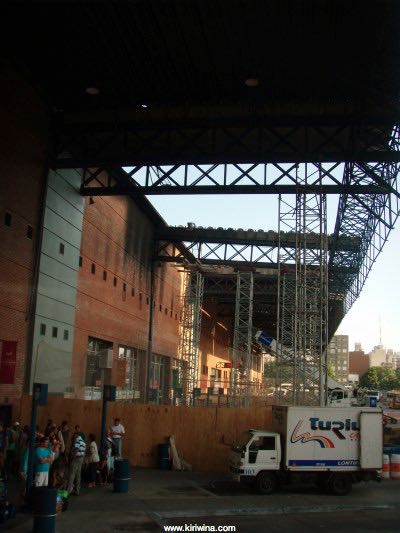
Arriving at Tres Cruces coach terminal in Montevideo. Fire damage from last year is currently under repair.
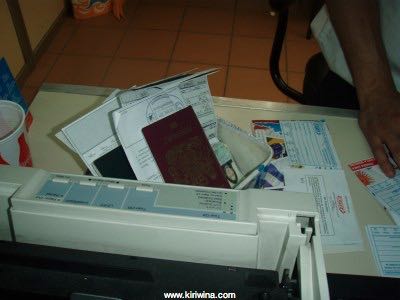
Our EGA coach service into Brazil is full. Passports are retained at checkin and will be returned tomorrow morning. This thoughful approach means passengers are not woken when crossing from Uruguay into Brazil.
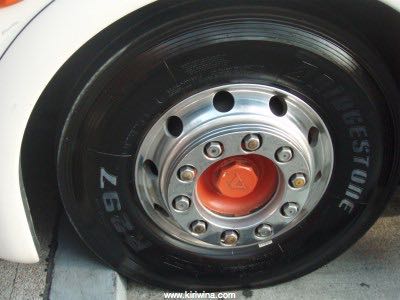
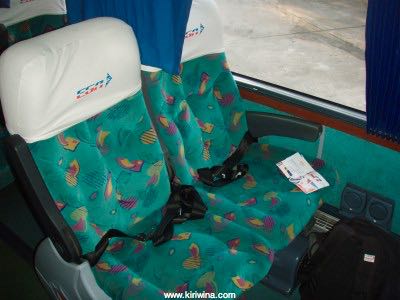
CGA coach sparkling clean. Even the tyres are freshly blackened.
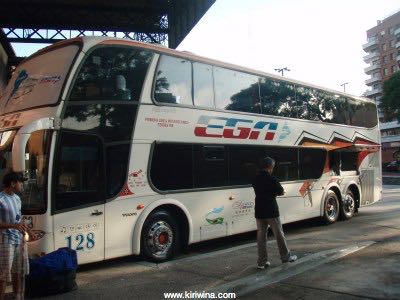
Comfortable interior with slightly lurid trim.
Fire damage at Tres Cruces.
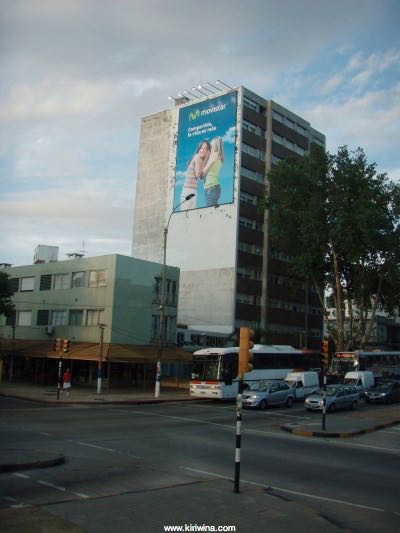
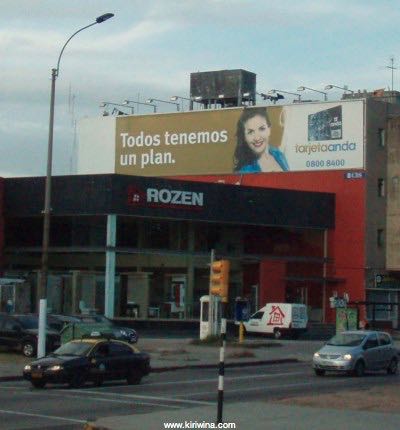
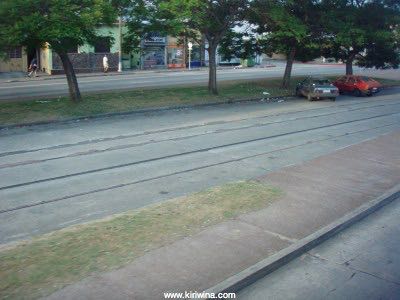
Street scenes en route eastwards out of Montevideo.


Crowded Hidrografia moorings in Carmelo.
Carmelo lifeboat.
Aging tug and barge.
Very, very long queue for customs and immigration at Carmelo.
Arriving at Tres Cruces coach terminal in Montevideo. Fire damage from last year is currently under repair.
Our EGA coach service into Brazil is full. Passports are retained at checkin and will be returned tomorrow morning. This thoughful approach means passengers are not woken when crossing from Uruguay into Brazil.
CGA coach sparkling clean. Even the tyres are freshly blackened.
Comfortable interior with slightly lurid trim.
Fire damage at Tres Cruces.
Street scenes en route eastwards out of Montevideo.